So, you finally bought a Mac? Congratulations!
Now it's time to learn how use it. And we're confident that with these few tricks, getting started will be easy for anyone who has never used one before - or at least hasn't since they were kids
Here is our complete beginner's guide on macOS - from launching programs all the way down to setting your display preferences so everything looks just right.
Apple Mac Guide
1. What Is macOS?
Mac computers are powered by the macOS operating system that has been exclusively developed for Apple products. This innovative technology gives users a stable and safe environment in which they can do anything they want without worrying about their personal data being hacked or compromised!
The macOS operating system has been a major player in the computer world ever since its debut back in 2001. With regular security updates and one upgrade each year, it's no wonder why so many people rely on this platform for their daily needs! macOS Is currently running version 12.1 Monterey - here are some features you'll be able to enjoy when using Apple’s latest update.
macOS is a sleek and sophisticated operating system that comes with an extensive collection of apps to simplify everyday tasks. It integrates seamlessly into the Apple family, including their mobile devices like iPhones or iPads for seamless connectivity wherever you go.
2. Setting Up Your New Mac
In about 20 minutes, you'll be able to set up your Mac. The first step is taking it out of the box and connecting any relevant devices like keyboards or pointing sticks for mouse-driven input methods (though not necessarily simultaneously). Once they're all connected properly with power running through them as well, hit 'Power' on top—you should see Apple's trademark logo appear before starting setup.
You'll need to connect to the Wi-Fi so make sure you have all of your information ready. You can choose from a variety: keyboard layout, time zone/cookies settings (to store user preferences), whether or not anonymous usage data will be shared with Apple.
To enjoy all the features on your new Apple device, you need an account if you have a previous Apple ID and iTunes account you can use that or create one now.
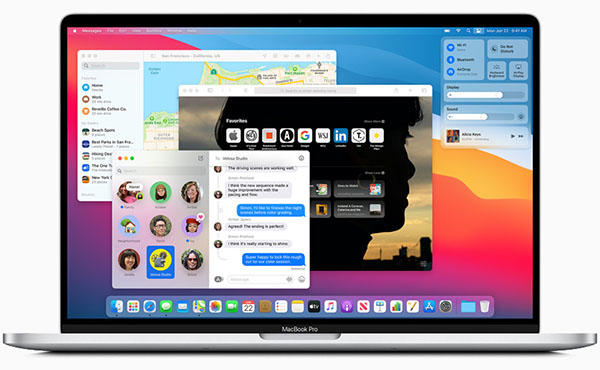
You're now ready to begin! As soon as you've made it through the initial setup, your Mac will restart. You'll see a clean desktop with an app icon in each corner and rows of icons along its bottom - this is known as 'The Dock'.
I hope these tips were helpful for getting started working on Apple.
3. Apple Device Care
3.1 Backups and Maintenance on macOS
By running updates and keeping a safe backup copy on hand for when things go wrong-you can rest assured that macOS is ready to handle anything life throws at him or her!
macOS is updated through the Mac App Store. For important system downloads including security fixes, firmware updates and new versions of first-party Apple software all you need to do it launch your app store account from within settings on macOS then click update tab.
Third-party apps that you download from the Mac App Store will receive updates in this manner. You can also find them through other means such as web surfing or file sharing, but they'll need updating manually otherwise! Most applications inform their users when there is a new version available for download and offer to install it on your behalf too - so no worries about missing out here unless something goes wrong with auto update settings.
3.2 Backing Up With Time Machine
With Time Machine, you can have peace of mind knowing that your data is always backed up and stored safely. It's easy to get started with - all it takes are some simple steps! Simply plug in an external drive for storing backups (you'll want at least as much room on the disk than what would be needed if installing system software) then select how often they should happen: weekly or daily? What size files do I want included?).
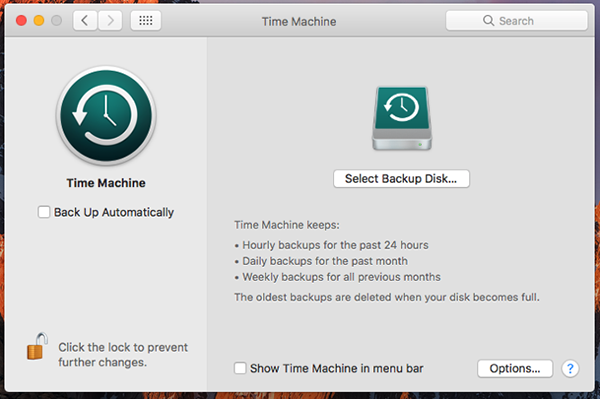
With your drive connected, go to System Preferences > Time Machine and select the backup disk. Choose an appropriate place on this removable hard drive for storing files that you'll need in case anything happens to your machine. Be careful as Time machine will delete everything on the disk, so if there is information you want to keep you need to create a partition.
When creating a partition (if necessary), make sure not only will all data be saved but also any other folders/ drives may exist outside its root directory; otherwise, their contents could get lost too when deleting them during restore processes.
The next time you connect your Mac, Time Machine will automatically start backing up the changes and creating browsable snapshots of what's changed since last backup. It won't back anything else unless requested - so no worries there.
The oldest backups are deleted first so you can always go back in time if something goes wrong. Just connect your Time Machine hard drive and click the icon for easy access.
Store your Time Machine backed up files on external drives so they're not lost forever when things get tough. This covers you for software breakdown as well as hardware, such as moving all of your software to a new Mac.
You can find your best laptop on our refurbished MacBooks section.


")

")
")

")

")
")


")
")
")
")


